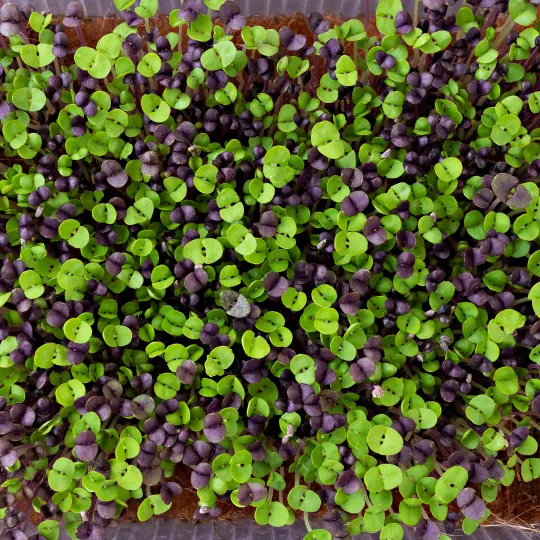

Microgreens can go from seed to harvest in a matter of days, but that short growing cycle leaves surprisingly little room for error.
Seeds that sit in waterlogged media, seedlings that receive insufficient light, or trays that remain humid without enough airflow can develop problems before there is much time to correct them.
The good news is that many microgreens growing mistakes are preventable. The key is to understand what causes them rather than repeatedly changing your growing routine and hoping for a better result.
Successful microgreens production depends on balancing a handful of variables: seed quality, sowing density, moisture, temperature, light, airflow, sanitation, and harvest timing.
These variables interact. For example, dense sowing may not cause a problem by itself, but combine it with excessive moisture and stagnant air, and the risk of disease increases.
This guide explains the most common mistakes, how to recognize them, what to do when they occur, and how to build a more reliable growing process.
Whether you grow a few trays at home or manage a small indoor production space, the same principle applies: observe the crop, identify the likely cause, change one variable at a time, and record the result.

Seed selection affects germination, crop uniformity, harvest timing, flavor, and the reliability of your entire growing process. A growing setup cannot compensate for seed that is unsuitable for the intended use or has poor viability.
Not every seed sold for gardening is automatically suitable for producing food that will be eaten raw. Seeds may have been treated with chemicals, stored under unsuitable conditions, or sold for ornamental planting rather than food production.
How to avoid it: Buy from a supplier that can clearly identify the crop and seed variety and provide appropriate information about its intended use. For commercial production, ask about seed handling, traceability, and food-safety controls. Never sow chemically treated seed for edible microgreens.
Seeds marketed specifically for microgreens are not automatically risk-free. Pathogens can be associated with seed, so supplier selection and safe handling remain important even when the product is sold for this purpose. Penn State Extension discusses these risks in its guide to food safety in microgreens production.
Older seed may germinate more slowly or less consistently, depending on the crop and how the seed has been stored. Heat, moisture, and fluctuating storage conditions can reduce viability.
Poor germination does not always mean the seed is old, however. Excessive planting depth, unsuitable temperatures, poor moisture management, and seed-specific requirements can produce similar symptoms.
How to avoid it: Keep seed dry, protected from excessive heat, and stored according to the supplier’s instructions. Label opened packets with the purchase or opening date. When a new batch behaves differently, test a small sample before committing a full production tray.
Peas, sunflowers, radishes, broccoli, basil, and cilantro do not necessarily follow the same timetable. Seed size, seed-coat characteristics, crop species, temperature, and seed condition all influence germination.
A tray that has not germinated on the same schedule as your radish crop may not be failing; it may simply be growing a slower species.
How to avoid it: Establish crop-specific expectations. Record the sowing date, first signs of germination, emergence uniformity, and time to harvest for each variety. Use your records to establish a realistic baseline rather than forcing every crop into one schedule.
Pre-sowing preparation is one of the easiest places to introduce inconsistency. The correct procedure depends on the seed, and a technique that benefits one crop may be unnecessary or unsuitable for another.
Some larger seeds, including many peas and sunflowers, are commonly soaked before planting. Soaking can help hydrate the seed and may improve or speed up germination under appropriate conditions. Smaller seeds and certain other crops may not need it.
Soaking is not automatically beneficial. Prolonged soaking, dirty containers, unsuitable water, or poor drainage after sowing can create conditions that encourage deterioration.
How to avoid it: Follow a crop-specific procedure. Use clean containers and suitable water, observe the recommended soaking time, and drain seeds thoroughly before sowing. Do not assume that longer soaking produces faster or better germination.
For commercial production, remember that water used for soaking is part of the food-production process and must be managed with food safety in mind.
Some crops benefit from soaking, while others need a different approach to achieve reliable emergence. Seed handling should not be based on habit alone.
How to avoid it: Create a short sowing checklist for each crop that specifies whether soaking is needed, the intended seed quantity, the growing medium, the sowing method, and the expected germination window. This reduces reliance on memory and makes it easier to train anyone helping with production.
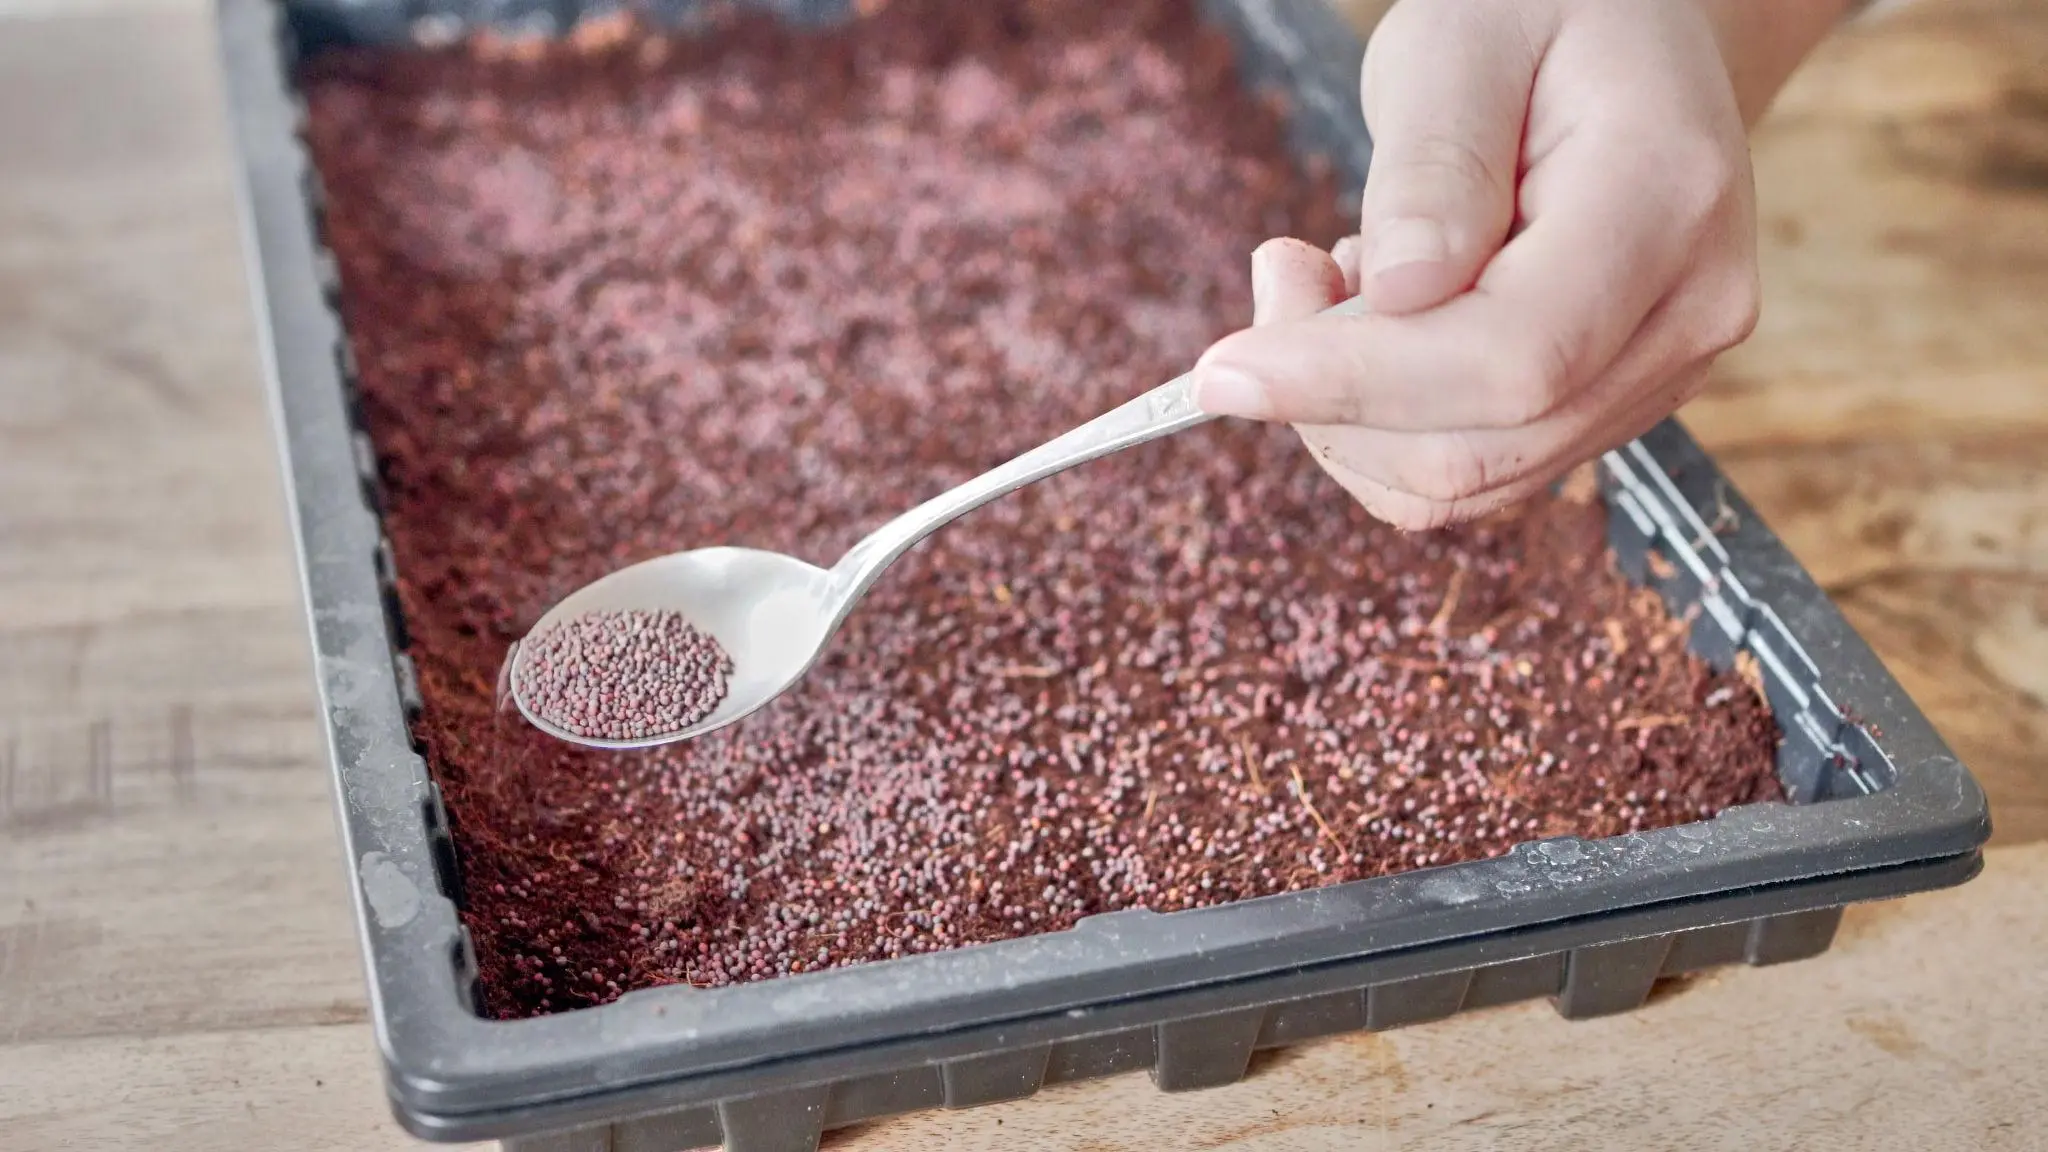
A tray can look impressive when seeds are spread thickly across the surface. But visual fullness immediately after sowing is not the same as a healthy, uniform crop at harvest.
When too many seeds compete in a limited area, seedlings can become crowded. Their stems and leaves overlap, moisture can remain trapped within the canopy, and harvesting becomes more difficult. Dense sowing can also make it harder to identify individual problem areas.
The appropriate density depends on seed size, crop species, tray dimensions, growing system, and the desired product. A seed count suitable for small radish seeds will not necessarily work for large pea seeds.
How to avoid it: Measure seed quantities by weight for each tray size and crop. Distribute the seeds as evenly as possible, and avoid large piles or bare patches.
If repeated trays develop weak growth or excessive moisture retention, test a modest reduction in seed density. Compare the result at harvest rather than judging success only by how full the tray looks on the first day.
The opposite problem is also common. Large gaps reduce the usable harvest area, while concentrated piles create crowded sections. Uneven sowing can therefore produce a tray with both underused space and sections that are too dense.
How to avoid it: Divide the seed into manageable portions and spread it across the tray in overlapping passes. Inspect the surface from above before starting germination. For very small seeds, a consistent sowing technique is often more valuable than trying to correct the pattern afterward.
Containers must suit the growing system and be clean, durable, and appropriate for their intended use. Poor drainage can leave the growing medium saturated, while damaged trays can hold residue or make cleaning difficult.
Containers intended for food production should be suitable for contact with food. Unknown plastics, painted containers, and materials that degrade or shed particles are not sensible choices for edible crops.
How to avoid it: Use purpose-built growing trays or suitable food-safe containers. In a substrate-based system, a tray with drainage holes can sit inside a separate catch tray. This arrangement makes bottom watering possible while allowing excess water to drain from the growing medium.
Do not confuse the catch tray with the growing tray: the outer tray should not leave the growing medium permanently submerged.
A suitable growing medium supports roots, retains enough moisture for germination, and allows excess water to drain. Dense garden soil can be heavy and poorly suited to shallow indoor trays, while an overly coarse or poorly wetted material may not provide uniform moisture.
No single medium is best for every grower. Peat-based mixes, coco coir, and other purpose-designed substrates have different physical properties and management requirements.
How to avoid it: Choose a clean, consistent medium suitable for edible seedlings and your growing system. Before sowing a full tray, check how the material absorbs water and whether it drains evenly.
The University of Maryland Extension’s guide to growing microgreens indoors explains the role of lightweight growing media and the importance of managing moisture.
Used trays can retain roots, organic matter, and residues. Simply emptying a tray does not remove all material that may interfere with cleaning or contribute to contamination.
How to avoid it: Remove debris, wash trays with an appropriate detergent, rinse as needed, and apply a suitable sanitizer according to its label and intended use. Cleaning and sanitizing are different steps: cleaning removes soil and organic material; sanitizing reduces microorganisms on an already-clean surface.
Inspect trays for cracks, rough edges, and areas that are difficult to clean. Replace damaged equipment when it cannot be cleaned effectively.
Germination is a transition from a dry seed to a living seedling. The seed absorbs water, metabolic activity increases, and the root and shoot begin developing. During this stage, conditions must support the seed without leaving it in a persistently saturated environment.
A common mistake is to assume that seeds need as much water as possible to germinate. They need available moisture, but a saturated medium can restrict air around the developing roots and favor unwanted microbial growth.
Excessive moisture is especially problematic when combined with warm conditions, poor drainage, and stagnant air.
How to avoid it: Aim for evenly moist—not waterlogged—growing media. Check the tray rather than following a rigid watering schedule. If water remains pooled in the catch tray, remove the excess and investigate whether the medium is draining properly.
The opposite mistake is allowing the seed zone to dry before germination is established. Uneven moisture can produce patchy emergence because some seeds receive the water they need while others do not.
How to avoid it: Check the surface and the moisture within the medium during early germination. Use a consistent, gentle watering method that wets the seed zone without displacing seeds or flooding the tray.
If you use a cover to retain moisture, inspect the crop regularly rather than assuming it can remain covered indefinitely.
Covers can help retain warmth and moisture during germination. However, prolonged covering can trap excessive humidity, especially when condensation builds up and air circulation is limited.
Removing a cover too early may allow the seed zone to dry, particularly in a warm or dry room.
How to avoid it: Treat covering as a temporary stage, not a fixed rule for every crop. Follow the crop’s germination requirements and monitor actual emergence and moisture. Vent covers when appropriate, and remove them when the crop’s development and conditions indicate it is time.
A blackout period is often used to encourage stem elongation and support a consistent early growth phase. But the duration and usefulness of blackout vary with crop, seed behavior, environmental conditions, and production goals.
Keeping a crop in darkness longer than necessary may produce weak or excessively elongated seedlings. Moving seedlings into light too early may be perfectly acceptable for some crops and systems.
How to avoid it: Use a crop-specific schedule as a starting point, then refine it using observed growth. Look at emergence, stem strength, uniformity, and readiness for light—not just the number of hours since sowing.

Water is essential for germination, nutrient movement, and plant growth. The challenge is providing enough without leaving roots and foliage unnecessarily wet.
A schedule can help organize work, but water demand changes with temperature, airflow, light, crop size, medium, and tray design. Two trays watered at the same time may not need the same amount of water.
How to avoid it: Check the growing medium and tray weight where appropriate. Learn how the medium feels and looks when adequately moist, and note how quickly it dries under your specific conditions.
Use the schedule as a reminder to inspect the crop, not as an instruction to add water regardless of need.
Top watering is not inherently wrong. It can be useful in certain stages and systems. But repeatedly wetting dense foliage can increase the time that leaves and stems remain damp and may displace seeds or damage delicate seedlings.
Bottom watering can help keep foliage drier, provided the growing tray has suitable drainage and is removed from standing water after the medium has absorbed enough moisture.
How to avoid it: Choose the watering method that gives the most even moisture with the least unnecessary wetting of edible plant parts. Observe the crop after watering and make sure water drains properly.
Penn State Extension’s microgreens growing guide discusses sub-irrigation and the value of keeping foliage dry when possible.
Water can introduce contamination into the production system. This matters particularly when microgreens will be eaten raw and when water is used for soaking, irrigation, or any post-harvest handling.
Water that looks clear is not necessarily microbiologically safe.
How to avoid it: Use a suitable, reliable water source and follow applicable food-safety requirements. Commercial growers should assess the source, maintain relevant records, and establish a water-management procedure appropriate to their production and jurisdiction.
Do not improvise a water-treatment process using arbitrary chemical concentrations. Any treatment must be suitable for the intended use and applied according to applicable guidance.
A little water used for bottom irrigation can be useful. Water left sitting around the base of the growing tray, however, may keep the medium too wet and encourage conditions favorable to root problems and fungus gnats.
How to avoid it: Allow the medium to absorb the required water, then drain away the excess. Check that the tray’s drainage holes are not blocked and that the catch tray is emptied as part of the watering routine.

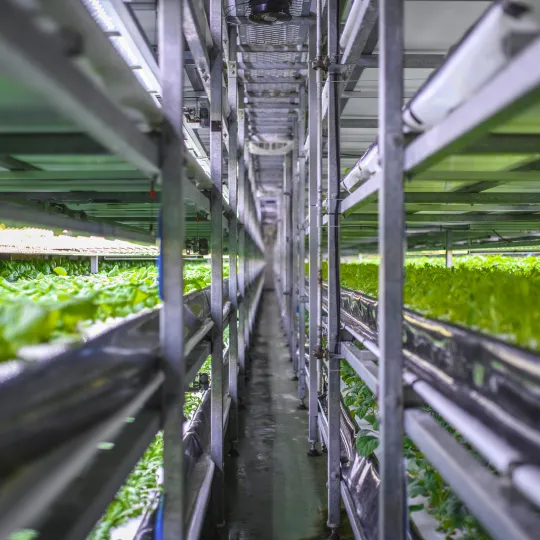
Indoor growing offers control over the environment, but it does not guarantee ideal conditions. A small room, crowded shelving, wet crops, and inadequate ventilation can create a microclimate very different from the one shown by a thermometer elsewhere in the building.
Temperature influences germination speed and subsequent growth. Different species and varieties respond differently, so a temperature that works well for one crop may be less suitable for another.
Virginia Tech’s introduction to microgreen production gives a general growing-temperature range while emphasizing that environmental settings should be adapted to the species, cultivar, and production system.
How to avoid it: Start with reliable crop-specific guidance. Measure temperature near the crop rather than relying only on a distant room thermostat. Record both the temperature and the crop’s response so that adjustments are based on evidence.
Humidity affects how quickly water evaporates from the crop and growing medium. High humidity can prolong surface wetness, especially when airflow is weak. Low humidity and strong airflow can increase drying and make moisture harder to maintain.
Neither extreme can be evaluated in isolation. Humidity, temperature, irrigation, and crop density work together.
How to avoid it: Use a thermometer and hygrometer to understand the environment around the trays. If crops remain wet for long periods, examine watering and airflow as well as humidity. If trays dry too quickly, consider the light, air movement, room temperature, and medium before simply watering more often.
Airflow helps exchange the air around the crop and can reduce prolonged wetness on plant surfaces. In densely stocked rooms, the air may remain relatively still between trays even when a fan is running somewhere nearby.
How to avoid it: Arrange equipment so that air can move around the crop without creating a strong, drying blast directly onto seedlings. Check for stagnant corners and blocked spaces between shelves. A gentle, consistent air movement is generally more useful than a fan aimed aggressively at one tray.
Airflow does not replace sanitation, correct watering, or temperature management. It is one part of the growing environment.
A covered tray can be useful during germination, but condensation that persists on the cover and growing surface may indicate that the environment is too wet or poorly ventilated.
How to avoid it: Check the crop and cover regularly. Vent or remove covers when appropriate for the crop’s stage. If excess moisture persists after the cover is removed, review watering, room humidity, and air movement together.
Light affects photosynthesis, plant form, color, and the pace of growth. A crop may germinate successfully in low light, yet struggle to produce strong, marketable growth afterward.
Insufficient light can produce elongated, weak-looking seedlings as plants grow toward the available light source. Stems may become thin, and growth may be less uniform.
However, elongated seedlings are not proof of a lighting problem by themselves. Crowding, temperature, and the crop’s normal growth habit may also contribute.
How to avoid it: Use a suitable grow light or an appropriate natural-light setup. Evaluate both the duration and the intensity of light reaching the canopy. A lamp being switched on does not tell you whether the crop is receiving enough usable light.
Increasing the number of light hours does not automatically solve poor growth. Light intensity, spectrum, crop species, and daily light integral all influence how the crop responds. More operating hours can also increase electricity use without delivering a proportional improvement.
How to avoid it: Establish a reasonable starting schedule based on reliable guidance, then observe crop quality and energy use. Change light duration only when you have a reason to believe it is limiting performance.
For commercial growers, measure or estimate light at the crop level where practical. Virginia Tech’s production guide explains daily light integral and why lighting targets vary across microgreen crops and systems.
Light intensity at the canopy depends on the fixture, its output, optics, mounting height, and the area being illuminated. A distance suitable for one fixture may be unsuitable for another.
Lights placed too far away may deliver insufficient intensity. Fixtures placed too close can create uneven illumination or excessive heat, depending on the equipment.
How to avoid it: Follow the fixture manufacturer’s guidance and assess the canopy across the entire tray. Look for uneven growth from one side to another and check for heat near the leaves. Adjust the mounting height only after considering the fixture’s actual characteristics.
Terms such as 4000 K and 6500 K describe a lamp’s correlated color temperature. They do not, by themselves, tell you the amount of light reaching the plants or whether the fixture is efficient for a particular growing setup.
How to avoid it: Compare fixtures using relevant technical specifications, including light output, distribution, energy consumption, and suitability for growing plants. A fixture’s advertised color temperature alone is not enough to determine performance.
In a multi-tier growing system, trays may receive different amounts of light because of fixture placement, shelf dimensions, shadows, and the position of the crop.
How to avoid it: Check plants at the edges and center of each shelf. If one location consistently produces weaker growth, investigate the light distribution before changing the entire room’s settings. Record the shelf and tray position alongside crop results.
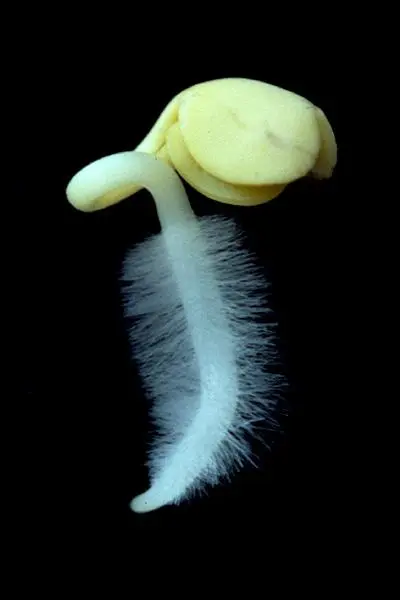
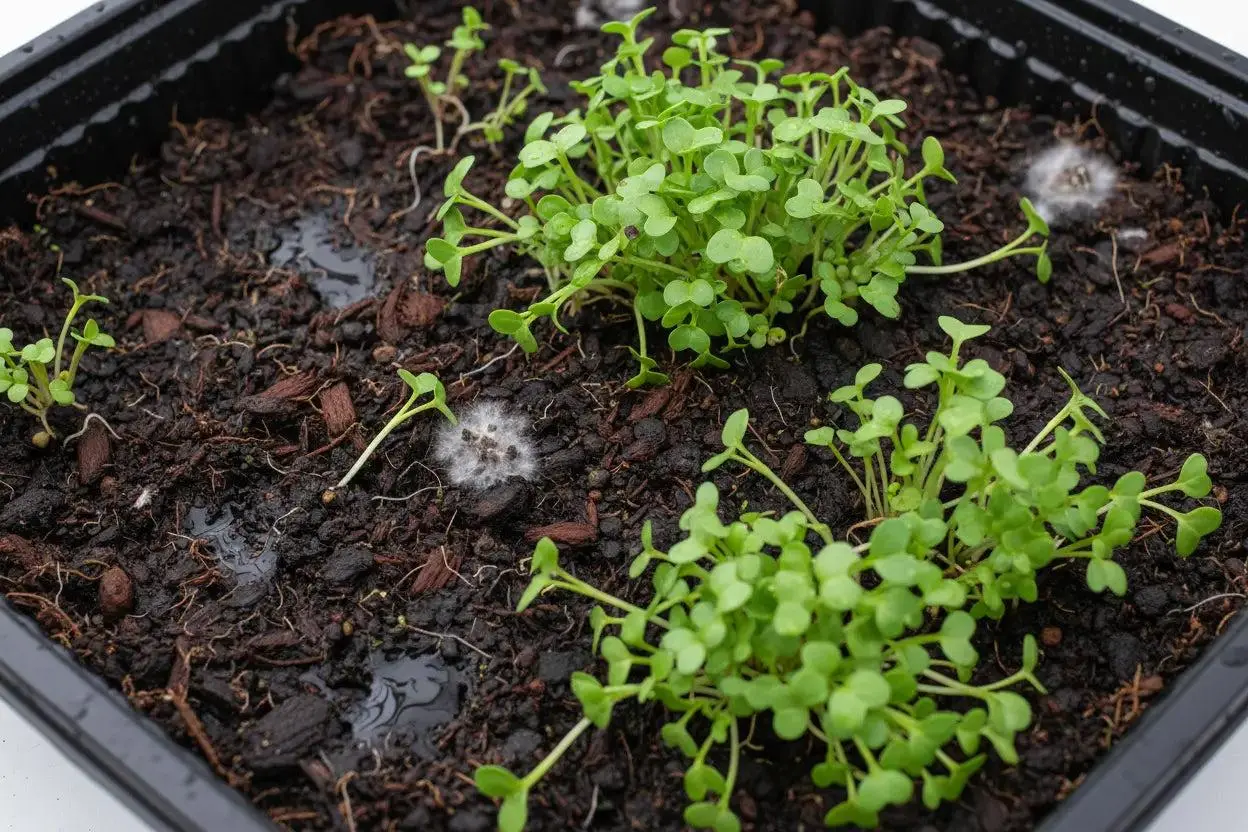
White growth around seedlings often causes concern, but not every white, fuzzy structure has the same cause. A useful diagnosis considers where it appears, how it develops, whether seedlings remain healthy, and whether other signs of decay are present.
Some seedlings develop fine root hairs around their roots. These can look like a white fuzz, particularly when roots are exposed to moisture. However, visual appearance alone is not always enough to distinguish normal root hairs from fungal growth.
How to investigate: Examine where the fuzz appears and how it changes over time. Root hairs are generally associated with the root surface. Suspicious growth may spread across seed hulls, the growing medium, or plant material and may be accompanied by a musty smell, slimy tissue, or collapsing seedlings.
These are clues, not a definitive diagnosis. When you cannot confidently determine whether growth is normal or contaminated, do not assume the tray is safe to eat.
How to prevent the problem: Use clean equipment, appropriate seed density, suitable moisture, good drainage, and adequate airflow. Avoid leaving covers on longer than necessary.
Damping-off describes a group of seedling diseases that can cause young plants to weaken, collapse, or die. It is associated with several pathogens, and conditions that remain warm and wet can favor disease development.
A tray with seedlings that are collapsing near the base, dying in patches, or failing to establish deserves attention. These signs do not identify a specific pathogen on their own, but they suggest the crop should be investigated rather than simply watered more.
How to respond: Separate the affected tray from healthy production, avoid spreading wet media or debris, and review sanitation, moisture, temperature, and airflow. For food production, do not harvest visibly diseased or suspect material for consumption. Clean equipment thoroughly before reuse.
It is tempting to keep a tray going because seeds, time, and materials have already been invested. But a badly affected tray can consume more labor while producing an unreliable harvest.
How to decide: Consider the extent of the problem, the condition of the edible tissue, and whether the cause is understood and controllable. If disease or contamination is suspected, do not treat visual improvement as proof that the crop is safe.
Record what happened, dispose of affected material appropriately, clean the equipment, and correct the likely cause before resowing.

Indoor production reduces exposure to some outdoor pests, but it does not eliminate insects or contamination risks. Wet organic material, poor cleaning, and openings to the outside can allow problems to persist.
Fungus gnats are small, dark flies often associated with moist growing media and organic matter. Adults are noticeable because they fly around trays or lights, but the immature stages develop in the growing medium. In large numbers, larvae can damage roots and stunt young seedlings.
How to prevent them: Find the source instead of only reacting to adult flies. Check wet media, spilled substrate, standing water, nearby potted plants, and areas where organic debris accumulates. Reduce unnecessary moisture and remove breeding material where possible.
The Utah State University Extension fungus gnat guide explains their life cycle and why controlling the breeding environment matters.
A product that is suitable for ornamental plants may not be suitable for crops that will be eaten. Homemade mixtures and unverified pesticide recommendations can create residues or damage seedlings.
How to avoid it: Prioritize sanitation, moisture management, exclusion, monitoring, and identification. If a pesticide or other treatment is being considered, confirm that it is legally permitted and specifically suitable for the intended crop and use in your jurisdiction. Follow the label and applicable food-safety requirements.
Do not assume that a natural or homemade product is automatically safe for edible microgreens.
Plant debris, spilled substrate, standing water, and dirty tools can undermine an otherwise consistent growing process. Problems may recur because the source remains in the room after the affected tray is removed.
How to prevent it: Make room maintenance part of the production schedule. Remove debris, clean high-contact surfaces, check drainage, and keep seed and packaging storage areas organized. Separate clean equipment from used trays and waste.

Microgreens are often eaten raw, which means there may be no cooking step to reduce microbial hazards. A healthy-looking crop is not necessarily a microbiologically safe crop. Food safety therefore needs to be part of production from seed selection through packing and storage.
Pathogens cannot reliably be detected by sight, smell, or taste. A tray can look fresh and uniform while still having been exposed to contaminated seed, water, equipment, hands, or growing media.
How to prevent it: Establish routine hygiene and sanitation procedures. Use appropriate water, maintain clean tools and surfaces, protect harvested greens from contamination, and keep records of relevant production and cleaning steps.
Commercial growers should follow the requirements applicable to their location and sales channel. Guidance from another country can help explain general principles, but it does not replace local regulations.
Scissors, knives, hands, and work surfaces can transfer contamination to the crop. Tools that are difficult to clean or that accumulate plant residue increase the chance of poor hygiene.
How to avoid it: Use clean, suitable harvesting tools and a defined cleaning and sanitizing procedure. Wash hands properly before handling the crop. Keep harvested greens away from dirty trays, used media, floors, and other potential sources of contamination.
Cutting directly into the substrate can introduce particles and contamination into the harvest. It can also make the product harder to clean and pack consistently.
How to avoid it: Use a clean, sharp cutting tool and harvest above the growing medium, leaving roots and substrate behind. The appropriate cutting height depends on the crop and product specification, but the objective is to collect the intended edible portion without dragging it through the medium.
Microgreens harvested too early may not have developed the desired size, leaf appearance, or flavor. Waiting too long can change texture, stem structure, and the proportion of true leaves.
There is no single ideal harvest day for every crop. Species, variety, temperature, light, and the intended market all affect readiness.
How to avoid it: Define harvest criteria for each crop. Use visual maturity, stem strength, leaf development, flavor where appropriate, and product specifications alongside the number of days since sowing.
A calendar is useful for planning, but it should not replace checking the crop.
Washing can remove visible debris, but it can also damage delicate tissue, leave excess moisture, and shorten shelf life if the greens are not dried and handled appropriately. For commercial production, post-harvest washing must be part of a validated food-safety procedure—not an improvised step.
Penn State Extension’s food-safety guidance for microgreens producers notes that post-harvest washing is not recommended in that production guidance unless necessary, because washing can spread contamination if the water and process are not properly controlled. Other home-growing guidance recommends rinsing before consumption. These recommendations address different handling contexts, so do not treat them as interchangeable.
How to avoid it: For commercial sale, follow applicable local requirements and a documented process appropriate to your operation. For home consumption, follow trustworthy food-safety guidance and use clean drinking water when washing is recommended. In either case, avoid handling greens with contaminated water or equipment.
Excess moisture in a package can contribute to faster quality deterioration. Warm storage can also shorten the useful life of a fresh product. But the precise storage life depends on the crop, handling, packaging, and temperature.
How to avoid it: Handle harvested greens gently, keep them appropriately cool, and use clean packaging designed for the intended food use. Avoid sealing visibly wet produce into a package unless the process and packaging are specifically designed to manage that moisture.
Do not promise a universal shelf life for all microgreens. Establish a realistic use-by period based on crop-specific handling, packaging, temperature control, and applicable requirements.
Not every crop is equally forgiving, and not every crop suits every growing system or market. Choosing a crop because it looks attractive in a photograph can lead to unnecessary frustration if its germination requirements, cycle length, or handling needs do not fit your setup.
Each crop may require different seed quantities, preparation steps, germination conditions, watering practices, and harvest timing. Introducing many varieties at once makes it difficult to understand which variable caused a poor result.
How to avoid it: Start with a manageable number of crops and learn their behavior under your actual conditions. Expand only when you can reproduce acceptable results and have a clear process for recording differences.
A single general procedure can help standardize routine work, but it should not erase meaningful crop differences. Seed size, germination speed, preferred conditions, and harvest maturity vary.
How to avoid it: Use a shared standard operating procedure for universal tasks—such as equipment cleaning, recordkeeping, and safe handling—alongside crop-specific instructions for seed preparation, density, blackout, light, and harvest.
If you change the seed rate, medium, watering, light, and temperature simultaneously, a better or worse result will not tell you which change mattered. This makes it difficult to build a reliable production method.
How to avoid it: Start with a consistent baseline and change one major variable at a time where practical. Compare trays under similar conditions, and repeat promising changes before treating them as established practice.
For example, if radish microgreens are inconsistent, first check whether seed distribution and moisture are uniform. Once these are controlled, test a modest change in one factor and record the outcome.
A good growing system should produce more than a single successful harvest. It should help you repeat the result and recognize when performance begins to change.
Memory is unreliable for comparing small differences across several crop cycles. Without records, it is difficult to know whether a change in yield came from seed quantity, environmental conditions, medium, or harvesting.
How to avoid it: Record the crop and variety, seed lot where available, seed weight, tray size, medium, sowing date, germination observations, light and temperature conditions, watering notes, harvest date, and usable harvest weight.
For a commercial operation, also record waste, packaging output, and any quality or safety concerns. Use the level of detail that helps you make decisions without creating unnecessary paperwork.
Germination is an early milestone, not the final measure of a successful crop. A tray can germinate well and still produce weak stems, uneven growth, contamination concerns, or an unmarketable harvest.
How to avoid it: Evaluate the complete cycle: emergence, uniformity, crop health, harvest timing, usable yield, labor, waste, and quality after harvest. A useful process is one that reliably produces the product you intend to grow—not merely one that produces seedlings.
In a multi-tier room, the upper shelf may be warmer while another shelf may receive less light or less air movement. These differences can create repeatable variation between trays even when the grower follows the same watering and sowing procedures.
How to avoid it: Label tray locations and compare results by shelf. Measure temperature and humidity in representative positions, and check the crop canopy for uneven light. If one shelf consistently underperforms, investigate its local conditions rather than changing every tray’s routine.
Without a baseline, it is easy to mistake normal crop variation for an improvement or to abandon a useful method after one poor result.
How to avoid it: Establish a repeatable starting method. Record several cycles where practical, then compare changes against that baseline. When a result differs sharply, first check for obvious deviations—seed lot, watering, room temperature, or equipment—before attributing the result to a new technique.
Symptoms are clues, not definitive diagnoses. Several different problems can produce similar appearances, so use the table to decide what to inspect next rather than immediately applying a treatment.
| Symptom | Possible causes | What to check first |
|---|---|---|
| Poor or patchy germination | Low seed viability, uneven moisture, unsuitable temperature, inconsistent sowing | Seed source and age, moisture distribution, seed density, crop-specific germination needs |
| Long, weak stems | Insufficient light, excessive warmth, crowding, normal crop habit | Light at canopy level, temperature, spacing and crop stage |
| Yellowing seedlings | Light limitations, root stress, excessive moisture, crop-specific nutrient or environmental issues | Root-zone moisture, drainage, light, crop age and whether symptoms affect all or only some areas |
| Seedlings collapsing near the base | Possible damping-off or other root/stem problems | Moisture, sanitation, affected areas and whether tissue is decaying |
| White fuzz near roots | Normal root hairs or possible fungal growth | Exact location, spread, plant health, odor and tissue condition; do not rely on appearance alone |
| Persistent wetness | Overwatering, poor drainage, high humidity, weak airflow | Catch tray, growing medium, cover use, room humidity and air movement |
| Small flies around trays | Possible fungus gnats or other small insects | Wet organic material, standing water, nearby plants and breeding sources |
| Uneven growth across one tray | Uneven sowing, watering, light distribution or local airflow | Seed distribution, tray level, irrigation pattern and light coverage |
| Uneven growth across shelves | Temperature, light or airflow differences between positions | Compare labeled shelf locations and measure conditions near the crop |
| Short shelf life | Excess handling, poor temperature control, excess moisture, packaging or contamination issues | Harvest handling, cooling, package suitability and the consistency of storage conditions |
When a tray starts to look wrong, resist the urge to change everything at once.
If the problem is severe, unexplained, or recurring, consult a qualified horticultural or plant-health professional rather than assuming a visual symptom identifies a specific disease.
A simple checklist can prevent many avoidable errors. Use it before each new crop cycle and adapt it to the species and growing system.
Poor germination can result from low seed viability, unsuitable temperature, uneven moisture, inconsistent sowing, or crop-specific seed requirements. Check the seed lot and growing conditions before changing the entire procedure. A small test sowing can help determine whether the problem is related to the seed or the growing setup.
Insufficient light is one possible cause, but it is not the only one. Excessive warmth, crowding, and the normal growth characteristics of the crop can also contribute. Check the light reaching the canopy, room temperature, and sowing density before deciding which adjustment is appropriate.
No. Fine white root hairs may be normal on some seedlings, but visual inspection cannot always distinguish harmless root growth from fungal growth. Consider where the fuzz appears, whether it spreads, and whether seedlings are healthy. If you cannot confidently assess a suspicious tray, do not assume it is safe to eat.
Either method can work when used correctly. Bottom watering can help keep foliage dry, but the growing tray must drain and should not remain submerged. Top watering may be appropriate for certain stages or systems, but avoid unnecessarily wetting delicate foliage and displacing seeds.
No. Blackout practices depend on the crop, growing method, and production goal. Treat a blackout schedule as crop-specific guidance rather than a universal rule. Observe emergence and seedling development, and adjust the procedure only when there is a clear reason.
Not necessarily. Many microgreens are harvested while they are still using nutrients stored in the seed, so additional fertilizer may not be required in a short growing cycle. Requirements depend on the crop, growing medium, system, and production duration. Avoid adding fertilizer automatically without understanding whether it is needed and suitable for the intended system.
Start with clean equipment, suitable seed density, good drainage, and consistent moisture management. Avoid leaving trays covered longer than necessary, and provide adequate air movement. If suspicious growth or seedling collapse appears, assess the tray carefully and do not assume the problem can be solved simply by adding a fan.
Do not assume that a tray is safe because you remove the visible growth or because the greens look better later. If the crop shows suspected mold, decay, or unexplained seedling disease, the safest course is not to consume the questionable produce. Review the growing conditions and clean the equipment before the next cycle.
There is no universal watering frequency. Water demand depends on the crop, growing medium, tray design, temperature, light, humidity, and airflow. Inspect the medium and drainage rather than watering automatically at fixed intervals.
Consistent observation and recordkeeping. Check the crop at the same stages, measure the variables that matter, and record what changes. This helps you identify patterns and make targeted improvements instead of repeatedly changing several parts of the process at once.
Most microgreens growing mistakes are easier to prevent than to correct after a crop has deteriorated. The strongest approach is not to search for one perfect watering schedule, one ideal light setting, or one universal growing recipe. It is to build a process that accounts for the crop, the growing system, and the conditions around it.
Start with suitable seed, clean equipment, a consistent sowing method, and a growing medium that manages moisture well. Then monitor the environment, check the crop’s progress, and record the results. When something goes wrong, investigate the likely cause before making changes.
Over time, those observations become a practical growing reference tailored to your own setup. Each crop cycle becomes an opportunity to improve consistency, reduce waste, and make better-informed decisions.
At Casa Grows, our goal is to make microgreens growing easier to understand and more practical to apply. Explore our other growing guides for help with the next stage of your process, from choosing a growing method to refining your crop-specific routine.

Microgreens can go from seed to harvest in a matter

Fresh and nutrient-dense microgreens delivered directly to chefs, health-conscious individuals, and premium kitchens.

Your personal details are strictly for our use, and you can unsubscribe at any time.